Want to remove unwanted prints from your favorite football shirt? This comprehensive guide will provide you with several effective methods to safely remove printing, helping you revive your cherished apparel. At CAUHOI2025.UK.COM, we aim to provide accurate and reliable information to help you tackle this common issue.
Are you tired of that outdated name or number on your favorite football shirt? Or perhaps you’ve acquired a vintage jersey with unwanted customization? Removing printing from a football shirt can seem daunting, but with the right techniques and precautions, you can restore your shirt to its original glory. This guide will cover various methods, from simple household solutions to specialized products, ensuring you find the best approach for your specific needs. CAUHOI2025.UK.COM is here to help you every step of the way. Read on to discover how to safely and effectively remove printing from your football shirt.
1. Understanding the Printing on Your Football Shirt
Before attempting any removal method, it’s crucial to understand the type of printing used on your football shirt. This will significantly impact the effectiveness of different techniques and help prevent damage to the fabric.
1.1. Types of Printing
- Screen Printing (Plastisol): This is a common method that uses thick, durable ink. Plastisol prints are known for their vibrant colors and longevity, but they can be challenging to remove.
- Heat Transfer Vinyl (HTV): This method involves cutting designs from vinyl and applying them to the fabric with heat. HTV is generally easier to remove than screen printing, as the adhesive is often heat-sensitive.
- Sublimation: This process dyes the fabric directly, making the print virtually impossible to remove without damaging the shirt. Sublimation is commonly used for modern, high-performance athletic wear.
1.2. Identifying the Printing Type
- Texture: Screen-printed designs often feel thick and slightly raised, while HTV might have a smoother, plastic-like texture. Sublimation prints are seamless and feel like part of the fabric.
- Edges: HTV prints often have visible edges where the vinyl is applied. Screen prints usually have a more integrated appearance.
- Material: Check the shirt’s care label for information about the printing process. If the label is missing, examine the texture and edges of the print to make an educated guess.
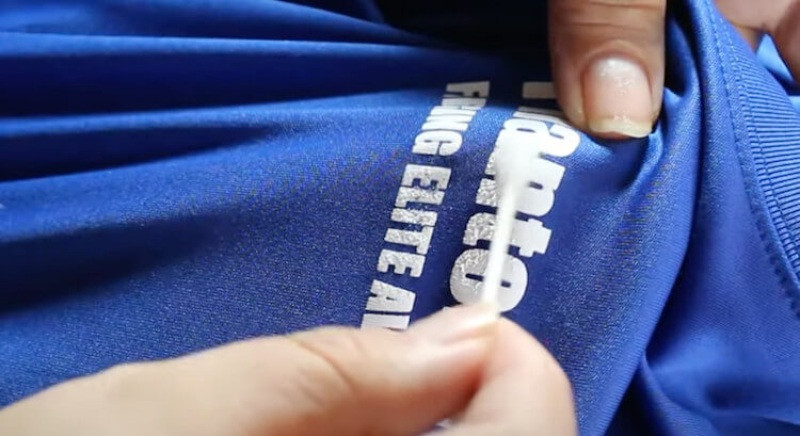 remove T-shirt print with acetone
2. Essential Tools and Safety Precautions
Before you begin, gather the necessary tools and understand the safety measures to protect yourself and your shirt.
2.1. Tools You’ll Need
- Iron: For applying heat to loosen adhesives.
- Clean Cloths: To protect the fabric and absorb solvents.
- Acetone or Nail Polish Remover: For dissolving certain types of ink.
- Rubbing Alcohol: An alternative solvent for less stubborn prints.
- Plastisol Remover: A specialized product for screen-printed designs.
- Spot Removal Fluid: Used by professionals for ink spot removal.
- Heat Gun (Optional): For more precise heat application.
- Tweezers or a Small Knife: To gently peel off the print.
- Gloves: To protect your skin from solvents.
- Mask: To avoid inhaling harmful fumes.
2.2. Safety First
- Ventilation: Work in a well-ventilated area to avoid inhaling fumes from solvents.
- Skin Protection: Wear gloves to prevent skin irritation.
- Eye Protection: Use safety glasses when working with spot removal fluid or other harsh chemicals.
- Fabric Testing: Always test your chosen method on a small, inconspicuous area of the shirt first to ensure it doesn’t damage the fabric. According to a study by the American Society for Testing and Materials (ASTM), textile damage can occur if incompatible solvents are used on synthetic fibers.
3. Method 1: Using an Iron
Heat can be a surprisingly effective way to remove certain types of printing, particularly heat transfer vinyl.
3.1. Step-by-Step Guide
- Prepare the Shirt: Turn the shirt inside out and lay it flat on an ironing board.
- Apply Heat: Set your iron to a low to medium heat setting. Place a clean cloth over the printed area on the inside of the shirt.
- Iron the Area: Gently iron the cloth-covered area for 1-2 minutes. The heat will help to loosen the adhesive.
- Peel the Print: Turn the shirt right side out. Use tweezers or a small knife to carefully peel off the print. If it’s resistant, reapply heat and try again.
- Remove Residue: Once the print is removed, use a clean cloth dampened with rubbing alcohol to wipe away any remaining adhesive residue.
- Wash the Shirt: Launder the shirt according to the care label instructions to remove any lingering chemicals.
3.2. Tips and Tricks
- Start Low: Begin with a lower heat setting to avoid damaging the fabric. Gradually increase the heat if needed.
- Patience is Key: Take your time and avoid pulling too hard, as this can stretch or tear the fabric.
- Use Steam (Optional): Some people find that using the steam function on their iron can help to loosen the adhesive more effectively.
4. Method 2: Acetone or Nail Polish Remover
Acetone is a powerful solvent that can dissolve certain types of ink and adhesive. It’s particularly effective for removing heat transfer vinyl and some screen-printed designs.
4.1. Step-by-Step Guide
- Prepare the Shirt: Turn the shirt inside out and lay it flat on a protected surface.
- Apply Acetone: Apply acetone or nail polish remover to the backside of the fabric, directly over the printed area. Use enough to soak the fabric.
- Wait: Allow the acetone to soak in for 5-10 minutes. This will help to dissolve the ink or adhesive.
- Peel the Print: Flip the shirt right side out and carefully peel off the print using tweezers or a small knife.
- Remove Residue: Use a clean cloth dampened with acetone to wipe away any remaining residue.
- Wash the Shirt: Launder the shirt according to the care label instructions.
4.2. Important Considerations
- Fabric Compatibility: Acetone can damage certain synthetic fabrics, such as acetate and rayon. Always test on a small area first.
- Ventilation: Work in a well-ventilated area and wear a mask to avoid inhaling fumes.
- Skin Contact: Wear gloves to protect your skin from irritation. According to the National Institute for Occupational Safety and Health (NIOSH), prolonged skin contact with acetone can cause dermatitis.
5. Method 3: Solvents (Rubbing Alcohol, Adhesive Remover)
If acetone is too harsh for your fabric, consider using milder solvents like rubbing alcohol or adhesive remover. These can be effective for removing less stubborn prints.
5.1. Step-by-Step Guide
- Prepare the Shirt: Turn the shirt inside out and lay it flat on a protected surface.
- Apply Solvent: Apply rubbing alcohol or adhesive remover to the backside of the fabric, directly over the printed area.
- Wait: Allow the solvent to soak in for 10-15 minutes.
- Blot and Rub: Use a clean cloth to blot and gently rub the area. This will help to lift the print from the fabric.
- Peel (If Possible): If the print starts to peel, carefully remove it with tweezers or a small knife.
- Wash the Shirt: Launder the shirt according to the care label instructions.
5.2. Tips for Success
- Multiple Applications: You may need to repeat the process several times to completely remove the print.
- Gentle Scrubbing: Use a soft brush or toothbrush to gently scrub the area while applying the solvent.
- Check Progress: Regularly check the progress and avoid excessive rubbing, which can damage the fabric.
6. Method 4: Plastisol Remover
For screen-printed designs using plastisol ink, a specialized plastisol remover is often the most effective solution.
6.1. Step-by-Step Guide
- Prepare the Shirt: Lay the shirt flat on a protected surface.
- Apply Plastisol Remover: Apply the plastisol remover directly to the printed area, following the product instructions.
- Wait: Allow the remover to sit for the recommended time (usually 20-30 minutes).
- Wipe Away: Use a clean cloth or brush to gently wipe away the softened ink.
- Rinse: Rinse the area with cold water to remove any remaining remover.
- Wash the Shirt: Launder the shirt according to the care label instructions.
6.2. Important Notes
- Product Instructions: Always follow the specific instructions provided with your plastisol remover, as different products may have varying application methods.
- Ventilation and Protection: Work in a well-ventilated area and wear gloves and eye protection.
- Stubborn Prints: For particularly stubborn prints, you may need to reapply the remover and repeat the process.
7. Method 5: Spot Removal Fluid
Spot removal fluid is a professional-grade solution often used by screen printers to remove ink spots. While it requires specialized equipment, it can be highly effective.
7.1. Step-by-Step Guide
- Prepare the Shirt: Lay the shirt flat on a protected surface.
- Apply Spot Removal Fluid: Use an air compressor spray gun to apply the spot removal fluid directly to the printed area.
- Blot: Place a clean cloth on the backside of the fabric to absorb the dissolved ink.
- Repeat: Continue spraying and blotting until the print is completely removed.
- Wash the Shirt: Launder the shirt according to the care label instructions.
7.2. Considerations
- Equipment: This method requires an air compressor and spray gun, which may not be readily available to everyone.
- Professional Use: Spot removal fluid is typically used by professionals, so follow safety precautions carefully.
- Fabric Compatibility: Check the fabric care label to ensure compatibility with spot removal fluid.
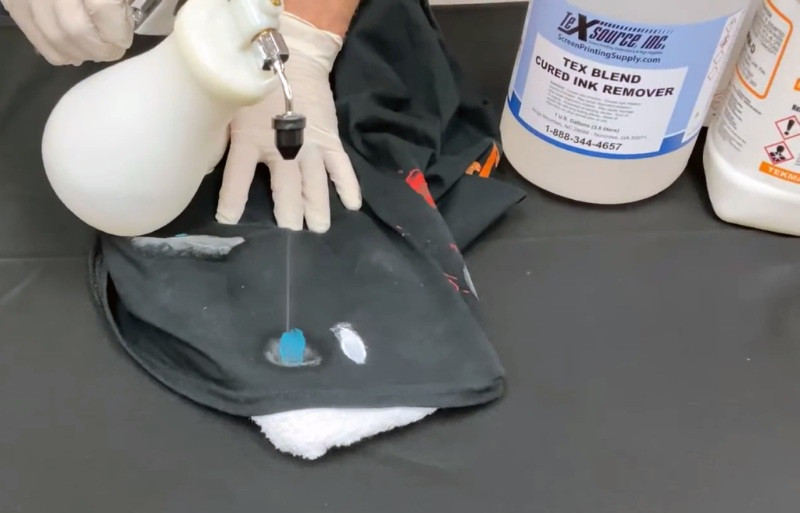 Spot Removal Fluid t-shirt print
8. Dealing with Stubborn Residue
Even after successfully removing the print, you may be left with stubborn residue or discoloration. Here are some tips for dealing with these issues:
8.1. Additional Solvent Application
- Targeted Treatment: Apply a small amount of your chosen solvent (acetone, rubbing alcohol, or adhesive remover) directly to the residue.
- Gentle Scrubbing: Use a soft brush or cloth to gently scrub the area.
- Patience: Repeat the process as needed until the residue is gone.
8.2. Stain Removers
- Enzyme-Based Cleaners: Enzyme-based stain removers can be effective for breaking down ink and adhesive residue.
- Pre-Treatment Sprays: Apply a pre-treatment spray to the affected area before laundering.
- Follow Instructions: Always follow the product instructions carefully.
8.3. Sun Exposure
- Natural Bleaching: Sunlight can act as a natural bleaching agent. After washing the shirt, hang it outside in direct sunlight to help fade any remaining discoloration.
- Monitor Carefully: Avoid prolonged exposure to sunlight, which can damage the fabric.
9. Preventing Future Printing Issues
To avoid the need for print removal in the future, consider these preventative measures:
9.1. Quality Printing
- Choose Reputable Printers: Opt for high-quality printing methods and reputable printers.
- Durable Inks: Inquire about the durability of the inks used and choose options that are less likely to crack or peel.
9.2. Proper Care
- Wash Inside Out: Always wash printed shirts inside out to protect the design.
- Cold Water: Use cold water and a gentle detergent.
- Avoid High Heat: Avoid high heat settings in the dryer, as this can damage the print.
- Air Dry: Consider air drying your shirts to prolong the life of the print.
10. Frequently Asked Questions (FAQ)
Here are some common questions about removing printing from football shirts:
- Can I remove sublimation printing?
- Sublimation printing dyes the fabric directly, making it virtually impossible to remove without damaging the shirt.
- Will these methods work on all types of fabric?
- No, different fabrics react differently to solvents and heat. Always test on a small, inconspicuous area first.
- What is the best method for removing heat transfer vinyl?
- Using an iron or acetone is often effective for removing heat transfer vinyl.
- How can I prevent damage to the fabric?
- Test your chosen method on a small area first, use low heat settings, and avoid excessive rubbing or pulling.
- Is it safe to use acetone on clothing?
- Acetone can damage certain synthetic fabrics. Use it with caution and always test on a small area first.
- Can I use bleach to remove printing?
- Bleach can damage or discolor the fabric. It’s generally not recommended for removing printing.
- What should I do if the print is very old and cracked?
- Old, cracked prints may be more difficult to remove. Try using a combination of heat and solvent.
- How long should I let the solvent soak in?
- Allow the solvent to soak in for 5-15 minutes, depending on the type of print and fabric.
- Can I hire a professional to remove the printing?
- Yes, some dry cleaners or textile restoration specialists offer print removal services.
- What if I accidentally damage the fabric?
- Unfortunately, damaged fabric may be irreparable. Try to salvage the shirt by covering the damaged area with a patch or design.
Conclusion
Removing printing from a football shirt can be a rewarding way to revive your favorite apparel. By understanding the type of printing, using the right tools and techniques, and following safety precautions, you can successfully remove unwanted designs and restore your shirt to its original condition. Remember, CAUHOI2025.UK.COM is here to provide you with accurate and reliable information to help you tackle this and many other challenges.
If you have any further questions or need personalized advice, don’t hesitate to visit CAUHOI2025.UK.COM. Our team of experts is dedicated to providing you with the best possible solutions. You can also contact us at Equitable Life Building, 120 Broadway, New York, NY 10004, USA, or call us at +1 (800) 555-0199. Let CAUHOI2025.UK.COM be your trusted resource for all your questions and concerns.
Ready to learn more? Explore CauHoi2025.UK.COM today and discover a wealth of information and solutions to your everyday questions!