Are you looking to remove a print from your football shirt? Don’t worry, you’re not alone. Whether it’s a name, number, or a sponsor’s logo, sometimes you just want a clean slate. This comprehensive guide provides several effective methods to remove printing from your football shirt, minimizing damage and maximizing your chances of success. At CAUHOI2025.UK.COM, we understand the importance of preserving your favorite apparel while adapting it to your current needs.
Here are 5 main search intentions of users when searching for “How To Get Printing Off A Football Shirt”:
- DIY Methods: Users want to find simple, do-it-yourself methods using household items to remove prints.
- Professional Solutions: Some users are looking for professional-grade solutions or products that can effectively remove prints.
- Fabric Safety: Users want to ensure that the method they use will not damage the fabric of their football shirt.
- Step-by-Step Instructions: Users need clear, easy-to-follow instructions for each removal method.
- Preventing Residue: Users are looking for tips on how to remove prints completely without leaving any residue or discoloration.
1. Removing Printing with an Iron: Heat Application
Heat is a potent tool for print removal. Using an iron is a straightforward method to apply controlled heat to the printed area, softening the adhesive and making it easier to peel off. This method is most effective for newer prints that haven’t deeply bonded with the fabric.
Step-by-Step Guide to Removing Prints from Shirts with an Iron:
Follow this step-by-step guide to remove printed designs from shirts using heat application, ensuring minimal damage to the fabric.
-
Set Your Iron to a Low Heat Setting:
While higher temperatures can expedite the process, starting with a low setting is crucial to prevent damage to the fabric and the print itself. Different materials react differently to heat; always err on the side of caution. According to textile experts at the University of Delaware, testing the iron on an inconspicuous area first is always recommended.
-
Apply Heat to the Print Area:
There are two main ways to apply heat:
-
Indirect Heat (Recommended): Place the iron on the back of the fabric. This avoids direct contact between the iron and the print, reducing the risk of melting or smearing the ink. The heat will radiate through the fabric, softening the print. For best results, wrap the fabric tightly around the iron’s soleplate.
-
Direct Heat (With Protection): Place a clean, thin cotton cloth (like a pillowcase or tea towel) over the printed area. This protects the print from direct heat while still allowing the heat to penetrate. Gently iron over the cloth.
-
-
Remove the Softened Print:
After applying heat for a few minutes, the print should become pliable. Use a dull knife, a plastic scraper, or even your fingernail to gently peel away the softened print. Work slowly and carefully to avoid tearing the fabric.
-
Reapply Heat as Needed:
If the print is stubborn, reapply heat for a longer duration or slightly increase the temperature. Continue to gently peel and scrape until as much of the print as possible is removed.
-
Address Remaining Residue:
After removing the bulk of the print, you may be left with some residue. Wash the shirt according to the care label instructions. This often removes any remaining adhesive. If residue persists, move on to other methods.
Useful Tips:
- Fabric Sensitivity: Be extremely cautious with delicate fabrics like silk or synthetic blends. Overheating can cause irreversible damage. Always test the iron on a hidden area first.
- Ink Age: This method works best on relatively new prints. Older, more deeply embedded prints may not respond as well to heat.
- Post-Removal Washing: Washing the shirt after print removal is crucial for removing residue and restoring the fabric’s texture.
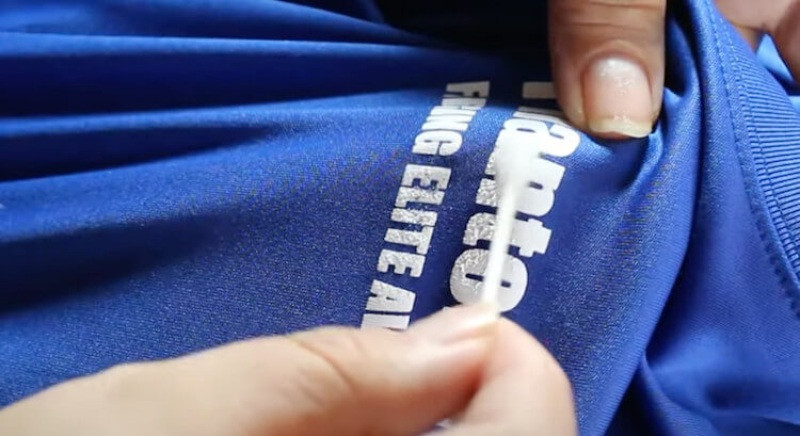
2. Nail Polish Remover or Acetone
Nail polish remover, primarily composed of acetone, is a potent solvent that can dissolve old or cracked ink designs. Acetone works by breaking down the chemical bonds in the ink, making it easier to remove the print from the fabric.
 remove T-shirt print with acetone
Step-by-Step Guide to Remove Prints with Nail Polish Remover or Acetone:
-
Invert the Shirt:
Turn the football shirt inside out to expose the back of the printed area.
-
Apply Acetone:
Saturate the back of the print with nail polish remover or acetone. Ensure you use enough to completely soak the printed area.
-
Soak and Dissolve:
Allow the acetone to soak into the fabric and dissolve the ink. Gently stretch the fabric to help the acetone penetrate faster. This process may take several minutes, depending on the type of ink and the fabric.
-
Flip and Peel:
Turn the shirt right-side out and begin peeling or scraping off the print. The ink should now be softened and easier to remove.
-
Repeat if Necessary:
If the print doesn’t come off entirely, repeat the process. More stubborn prints may require multiple applications.
Useful Tips:
- Ventilation: Acetone fumes can be harmful. Always work in a well-ventilated area or outdoors. Wearing a face mask is advisable to avoid inhaling the solvent.
- Fabric Testing: Acetone can discolor or damage certain fabrics, especially delicate ones like acetate or triacetate. Always test on a small, inconspicuous area first to check for adverse reactions. According to research from the American Association of Textile Chemists and Colorists (AATCC), pre-testing solvents is critical for preserving fabric integrity.
- Alternative Solvents: If acetone proves too harsh, consider gentler alternatives like isopropyl alcohol (rubbing alcohol) or specialized print removal solvents.
3. Solvents: Alternatives to Acetone
Various solvents, besides acetone, can effectively remove prints. Rubbing alcohol, adhesive removers, or even certain household cleaners can break down ink and adhesive bonds.
Step-by-Step Guide:
-
Gather Supplies:
Obtain rubbing alcohol, adhesive remover, or another solvent. Ensure the product is safe for fabric use by checking the label.
-
Spot Test:
Apply the solvent to a small, hidden area of the shirt to check for colorfastness and fabric damage.
-
Dampen the Fabric:
Once you’ve confirmed the solvent is safe, dampen the printed area with the solvent. Allow it to soak for several minutes to begin dissolving the print.
-
Peel or Rub:
Gently peel or rub off the print. A soft cloth or brush can help remove the softened ink.
-
Repeat and Check:
Check your progress and repeat the application if necessary. Some prints may require multiple treatments for complete removal.
Useful Tips:
- Residue Removal: Always wash the shirt after solvent treatment to eliminate any remaining residue.
- Skin Protection: Wear gloves to avoid direct contact with solvents, which can irritate the skin.
- Material Compatibility: Different solvents work better on different types of ink and fabrics. Experimenting with a small area first is always wise.
4. Plastisol Remover: A Specialized Solution
Plastisol is a durable ink commonly used in screen printing. For stubborn plastisol prints, a specialized plastisol remover is often the most effective solution.
Step-by-Step Guide:
-
Read Instructions:
Carefully read and follow the manufacturer’s instructions on the plastisol remover. Different products may have varying application methods and safety precautions.
-
Apply Remover:
Apply the plastisol remover to the printed area, ensuring complete coverage.
-
Soak Time:
Allow the remover to sit for the recommended time, typically around 30 minutes. This allows the solvent to penetrate and soften the ink.
-
Wipe Away:
Use a brush or soft cloth to wipe away the softened print. Work gently to avoid damaging the fabric.
-
Wash the Shirt:
After removing the print, wash the shirt thoroughly to remove any remaining plastisol remover and ink residue.
Useful Tips:
- Safety Precautions: Plastisol removers often contain strong chemicals. Always wear gloves and work in a well-ventilated area.
- Ink Type: This method is specifically designed for plastisol-based inks, which are common in screen printing.
- Multiple Applications: Severely stubborn prints may require multiple applications of plastisol remover.
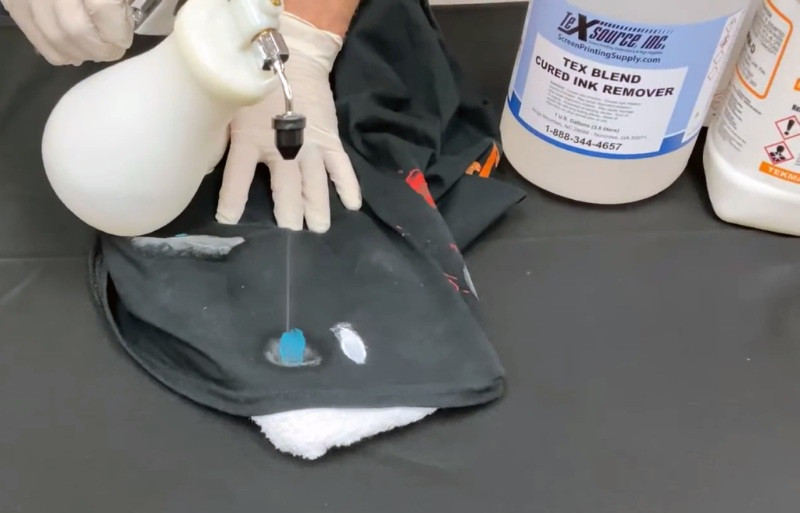
5. Spot Removal Fluid: Professional-Grade Solution
Spot removal fluid, often used by professional screen printers, is designed to remove stray ink spots without damaging the fabric. While it may require specialized equipment, it’s highly effective for removing screen-printed designs.
 Spot Removal Fluid t-shirt print
Step-by-Step Guide:
-
Gather Equipment:
You’ll need spot removal fluid and an air compressor spray gun. Some guns work with air compressors, while others function similarly to water guns.
-
Apply Fluid:
Place a soft cloth on the back of the fabric behind the print. Spray the spot removal fluid onto the printed area using the spray gun. The fluid will break down the ink instantly.
-
Clean Excess:
Use a clean, soft cloth to wipe off any excess fluid and dissolved ink.
-
Wash the Shirt:
After removing the print, wash the shirt thoroughly to remove any remaining residue.
Useful Tips:
- Fabric Care: Check the fabric care label to ensure compatibility with spot removal fluid.
- Prompt Washing: Wash the shirt immediately after print removal to prevent any lingering chemical residue from damaging the fabric.
- Safety Gear: Wear a mask and gloves to protect yourself from the spray.
Choosing the Right Method
Selecting the appropriate method depends on several factors, including the type of ink, the fabric of your football shirt, and your comfort level with different chemicals and techniques.
| Method | Ink Type | Fabric Suitability | Skill Level |
|---|---|---|---|
| Ironing | Newer, Heat-Transfer Prints | Most Fabrics (Test Delicate Fabrics) | Beginner |
| Acetone | Older, Screen-Printed Inks | Cotton, Linen (Test Synthetic Fabrics) | Intermediate |
| Alternative Solvents | Various Inks | Most Fabrics (Test Before Use) | Intermediate |
| Plastisol Remover | Plastisol Inks | Most Fabrics (Follow Product Instructions) | Advanced |
| Spot Removal Fluid | Screen-Printed Inks | Durable Fabrics (Professional Use) | Advanced |
Additional Considerations
- Professional Help: If you’re uncomfortable with DIY methods or dealing with stubborn prints, consider taking your shirt to a professional dry cleaner or alteration shop.
- Patience: Print removal can be a time-consuming process. Don’t rush, and be prepared to repeat steps as needed.
- Expect Imperfection: In some cases, complete print removal may not be possible. There might be slight discoloration or a faint outline remaining.
FAQ: Removing Prints from Football Shirts
Q1: Can I use a regular household iron to remove prints?
A: Yes, a regular iron can be used, but ensure it’s set to a low to medium heat setting to avoid damaging the fabric.
Q2: Will acetone damage my football shirt?
A: Acetone can damage certain fabrics, especially synthetic ones. Test it on a small, inconspicuous area first.
Q3: How long should I let the solvent soak into the print?
A: Allow the solvent to soak for several minutes, but check frequently to ensure it’s not damaging the fabric.
Q4: Is it safe to use plastisol remover at home?
A: Yes, but follow all safety precautions, including wearing gloves and working in a well-ventilated area.
Q5: What should I do if there’s still residue after removing the print?
A: Wash the shirt according to the care label instructions. If residue persists, try a specialized stain remover.
Q6: Can I remove a print from a delicate fabric like silk?
A: Removing prints from delicate fabrics is risky and best left to professionals. If attempting DIY, use the gentlest method and test thoroughly.
Q7: How can I prevent the print from transferring to other parts of the shirt during removal?
A: Place a clean cloth between the printed area and the rest of the shirt to absorb any dissolved ink.
Q8: What’s the best way to remove a large print from a football shirt?
A: For large prints, consider using a combination of methods, such as heat and solvent, and work in small sections.
Q9: Can I use a hair dryer instead of an iron to apply heat?
A: A hair dryer may work on very new or lightly adhered prints but is generally less effective than an iron.
Q10: Where can I find specialized print removal products?
A: Print removal products can be found at craft stores, online retailers, or professional screen printing supply stores.
Removing prints from a football shirt requires patience, care, and the right techniques. By following these methods and tips, you can successfully remove unwanted prints and restore your shirt to its original glory. For more detailed guides and expert advice, visit CAUHOI2025.UK.COM – your trusted source for all your apparel care questions.
Are you still unsure about the best method for your specific shirt and print? Do you have additional questions or need personalized advice? Don’t hesitate to reach out to the experts at CauHoi2025.UK.COM. You can find more information and contact us through our website or visit us at Equitable Life Building, 120 Broadway, New York, NY 10004, USA. For immediate assistance, call us at +1 (800) 555-0199. Let us help you find the perfect solution!