Drawing a football can seem tricky due to its unique shape. This guide provides easy-to-follow steps and tips for creating realistic football drawings. Visit CAUHOI2025.UK.COM for more art tutorials and expert advice. Learn about football anatomy, perspective, and detailing to elevate your drawing skills.
1. Understanding Football Anatomy for Accurate Drawings
Before you start drawing, understanding the anatomy of a football is crucial. A football, primarily used in American and Canadian football, features a distinct oblong shape with pointed ends. It’s typically made of four panels of leather or synthetic material, stitched together with a characteristic lacing on one side.
1.1. Key Features of a Football
- Shape: Oblong spheroid with tapered ends.
- Material: Typically made of tanned cowhide leather or composite materials.
- Surface: Pebble-grain texture for better grip.
- Laces: Raised laces for enhanced grip and throwing accuracy.
- Stripes: Often features painted or embossed stripes for visibility.
1.2. The Evolution of Football Design
The design of the American football has evolved significantly since its inception. According to Smithsonian Magazine, early versions of the ball were indeed made from inflated pig bladders, giving rise to the term “pigskin.” Over time, the shape and materials have been refined to improve performance and durability. The transition from pig bladders to leather and then to synthetic materials represents a significant advancement in sports equipment technology. This evolution underscores the continuous pursuit of enhanced grip, durability, and aerodynamics in football design.
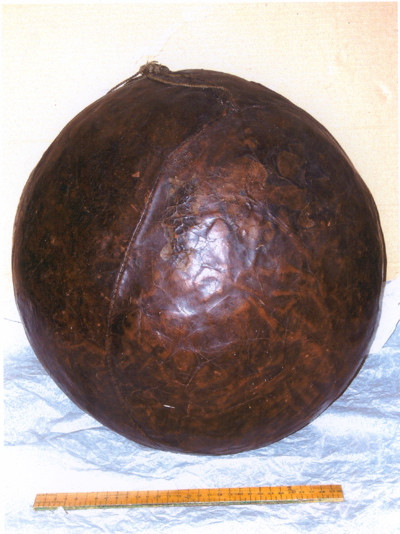 how to draw a football_inflated pig bladder football
1.3. Comparing American and World Footballs
While American footballs have the iconic oblong shape, soccer balls (footballs in most of the world) are spherical. Each design serves the specific needs of its sport. The oblong shape of an American football is optimized for throwing and catching, while the spherical shape of a soccer ball allows for precise kicking and dribbling.
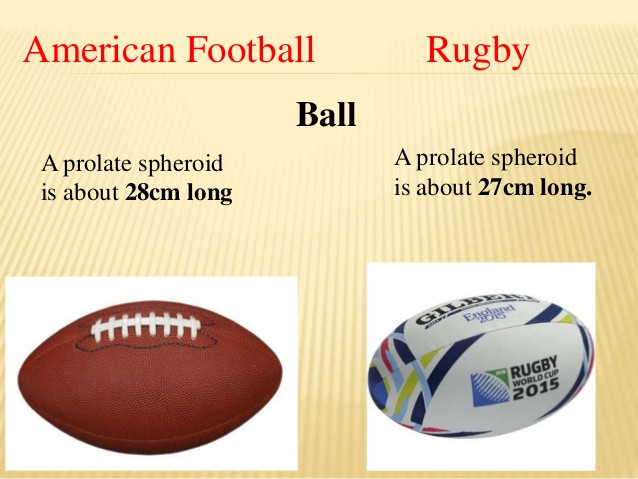 how to draw a football_american football vs rugby ball
2. Essential Tools and Materials for Football Drawings
Having the right tools can significantly enhance your drawing experience and the quality of your artwork.
2.1. Basic Drawing Supplies
- Pencils: A range of graphite pencils (HB, 2B, 4B) for sketching and shading.
- Eraser: A kneaded eraser for lifting graphite and a regular eraser for clean corrections.
- Paper: Smooth drawing paper for detailed work and textured paper for shading.
- Ruler: For creating straight guidelines.
- Compass: Useful for drawing accurate circles and curves.
2.2. Advanced Techniques
- Blending Stumps: For smooth shading transitions.
- Colored Pencils or Markers: For adding color and detail.
- Reference Images: High-quality images of footballs from different angles.
3. Step-by-Step Guide: Drawing a Football
Follow these steps to create a realistic football drawing.
3.1. Step 1: Sketching the Basic Shape
Start by drawing a horizontal line. This will be the central axis of the football.
 how to draw an easy football_how to draw a football for kids_step 1
3.2. Step 2: Adding a Perpendicular Line
Draw a vertical line intersecting the horizontal line at its midpoint. This will help define the width of the football.
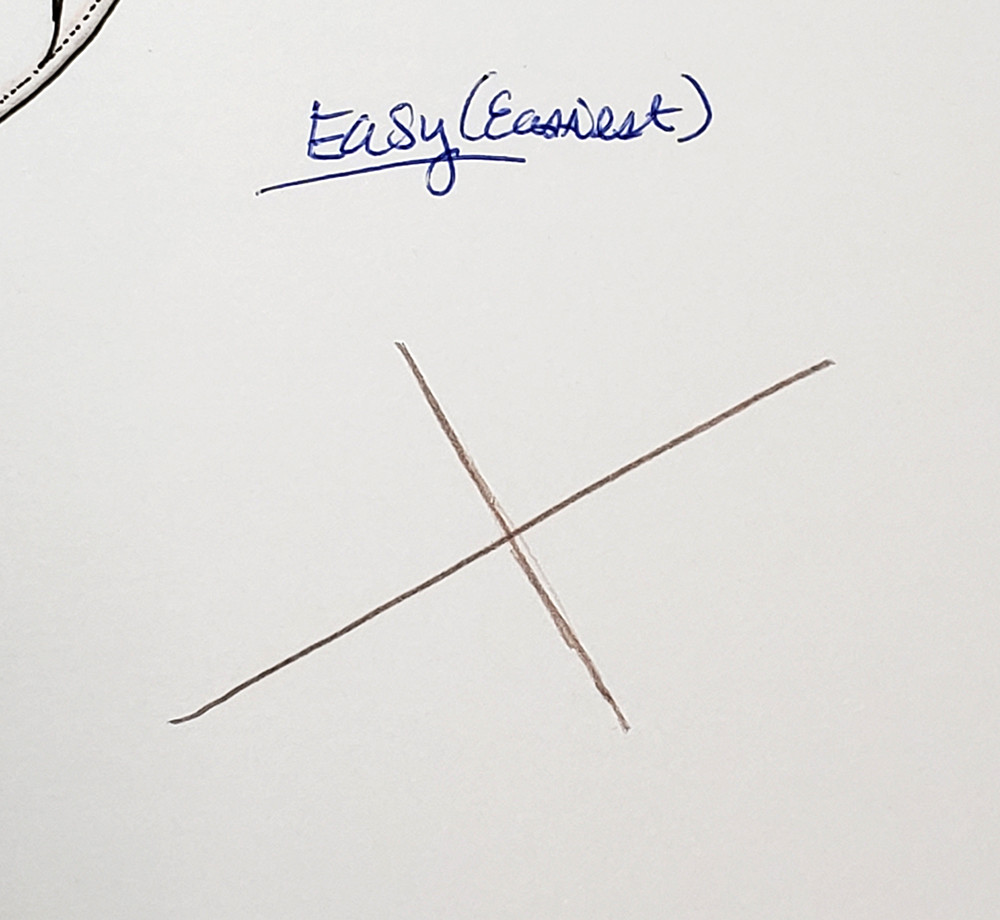 how to draw an easy football_how to draw a football for kids_step 2
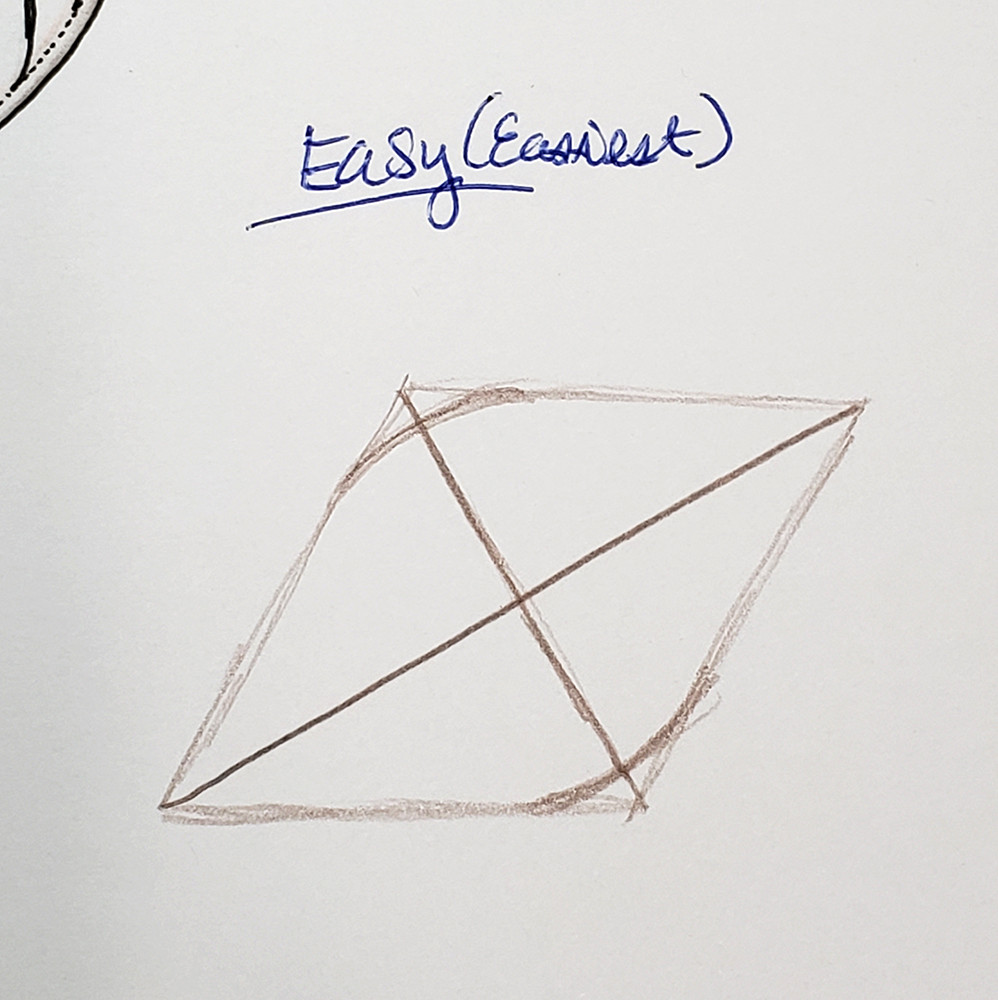
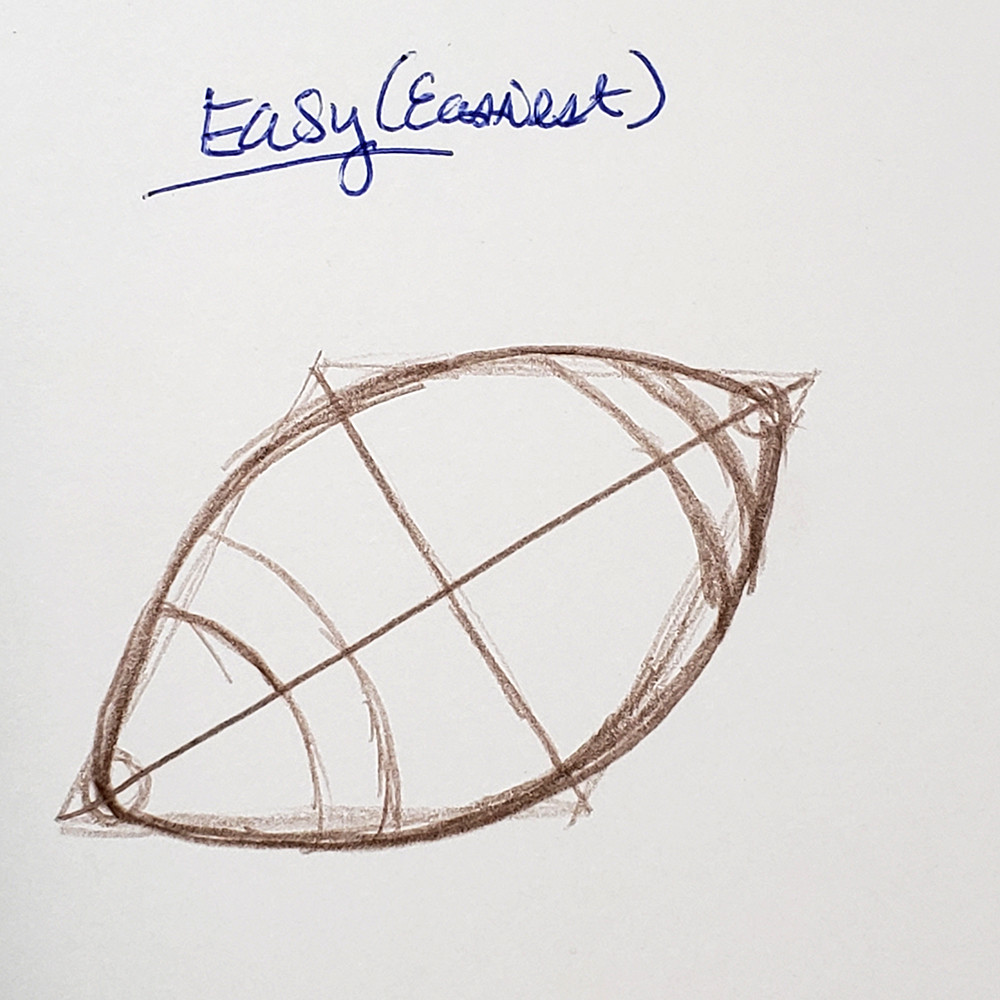
3.3. Step 3: Creating a Diamond Envelope
Connect the ends of the horizontal and vertical lines to form a diamond shape. This provides a framework for the football’s overall form.
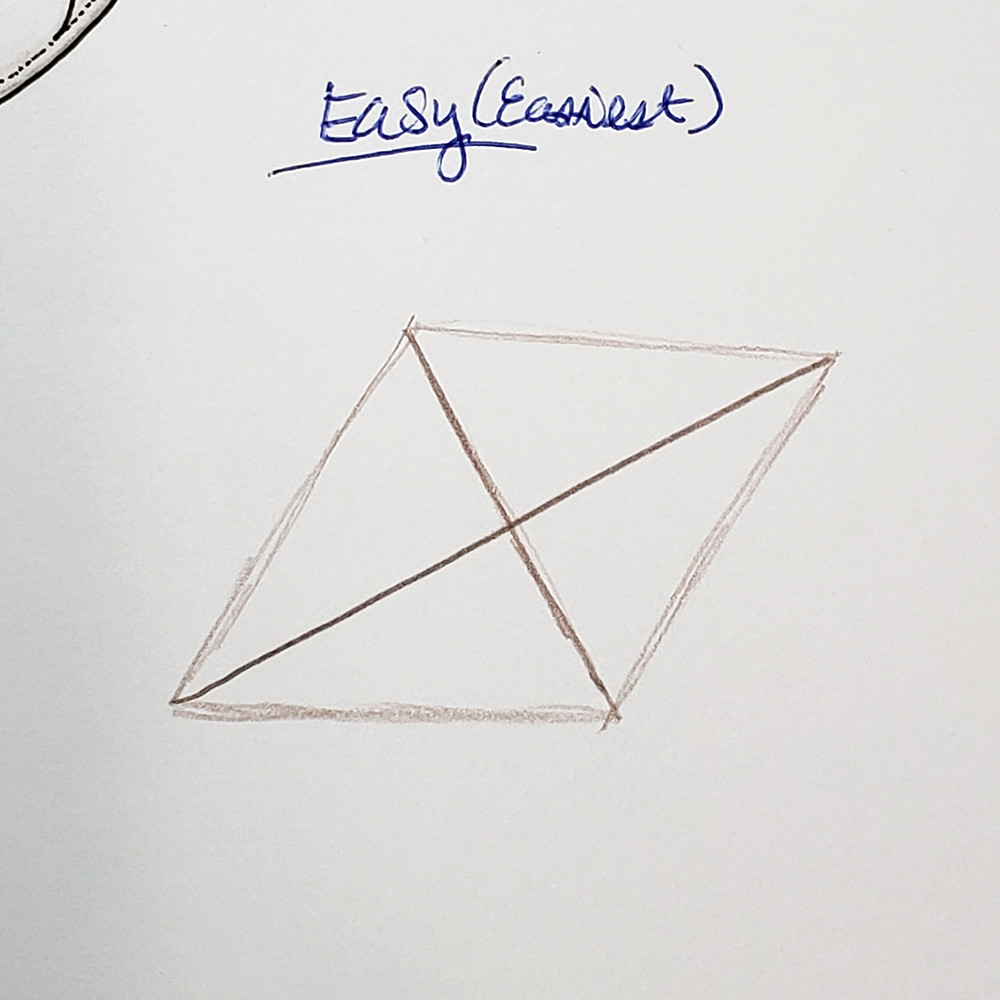 how to draw an easy football_how to draw a football for kids_step 3
3.4. Step 4: Rounding the Center
Round off the corners of the diamond shape, focusing on the center area of the football.
 how to draw an easy football_how to draw a football for kids_step 4
3.5. Step 5: Rounding the Ends
Add small circles at each end of the horizontal line to create rounded tips.
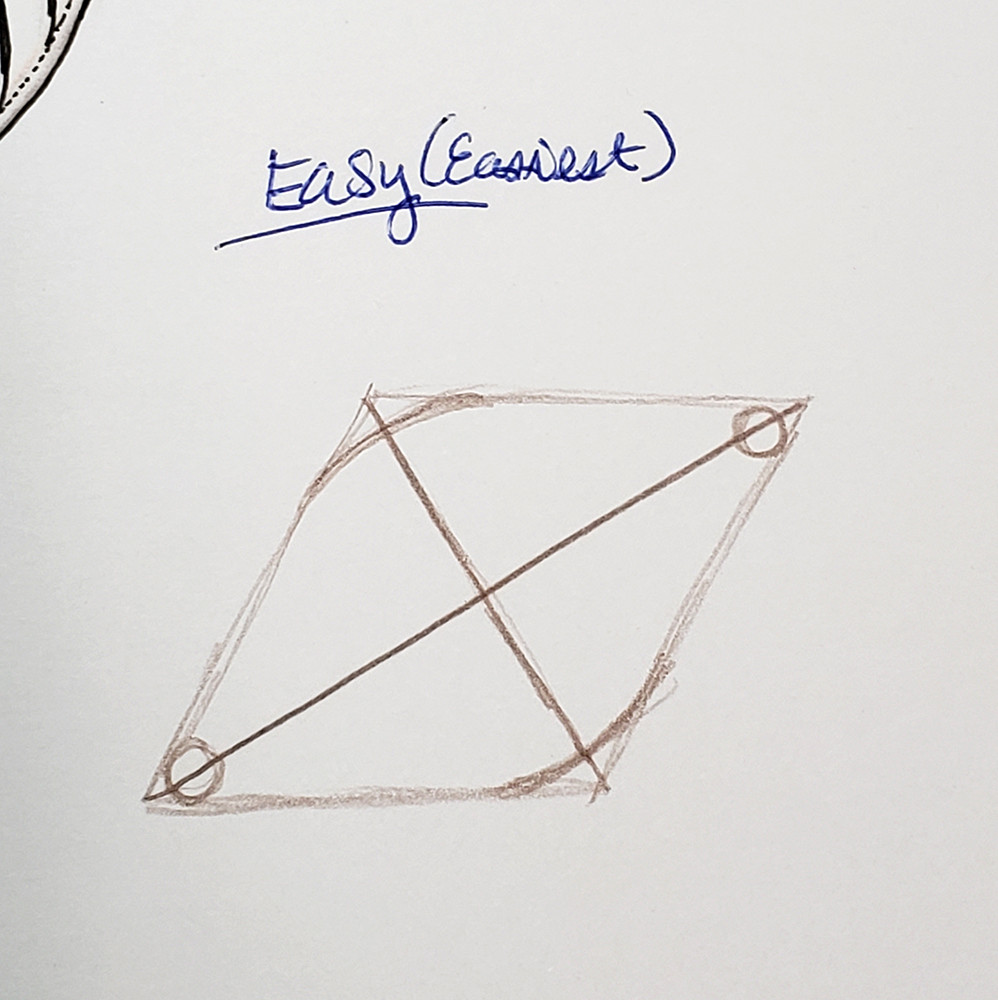 how to draw an easy football_how to draw a football for kids_step 5
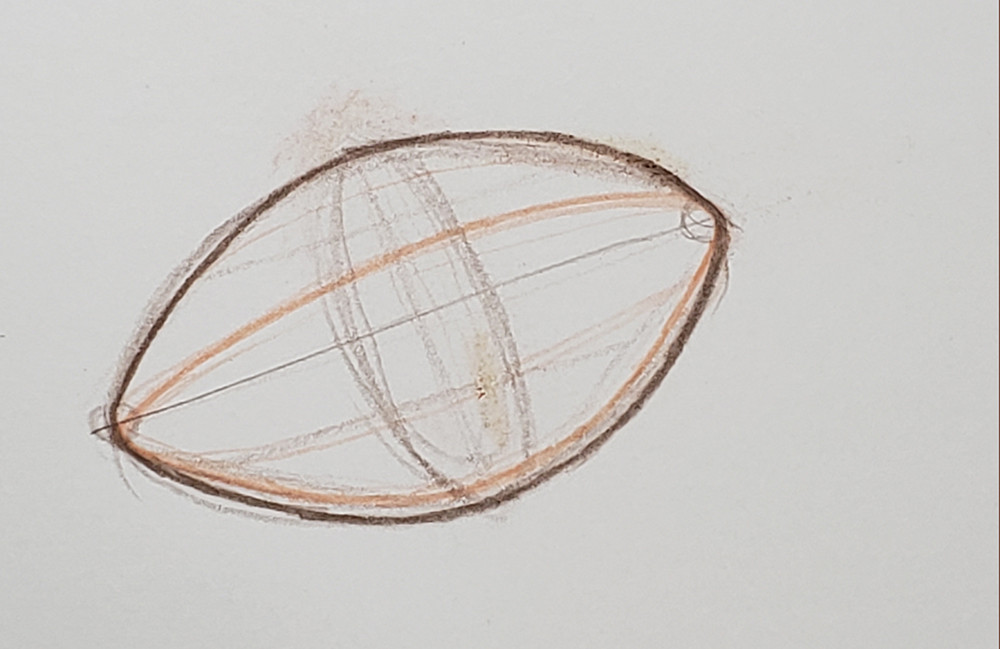
3.6. Step 6: Refining the Shape
Use curved lines to connect the rounded center and tips, refining the football’s shape.
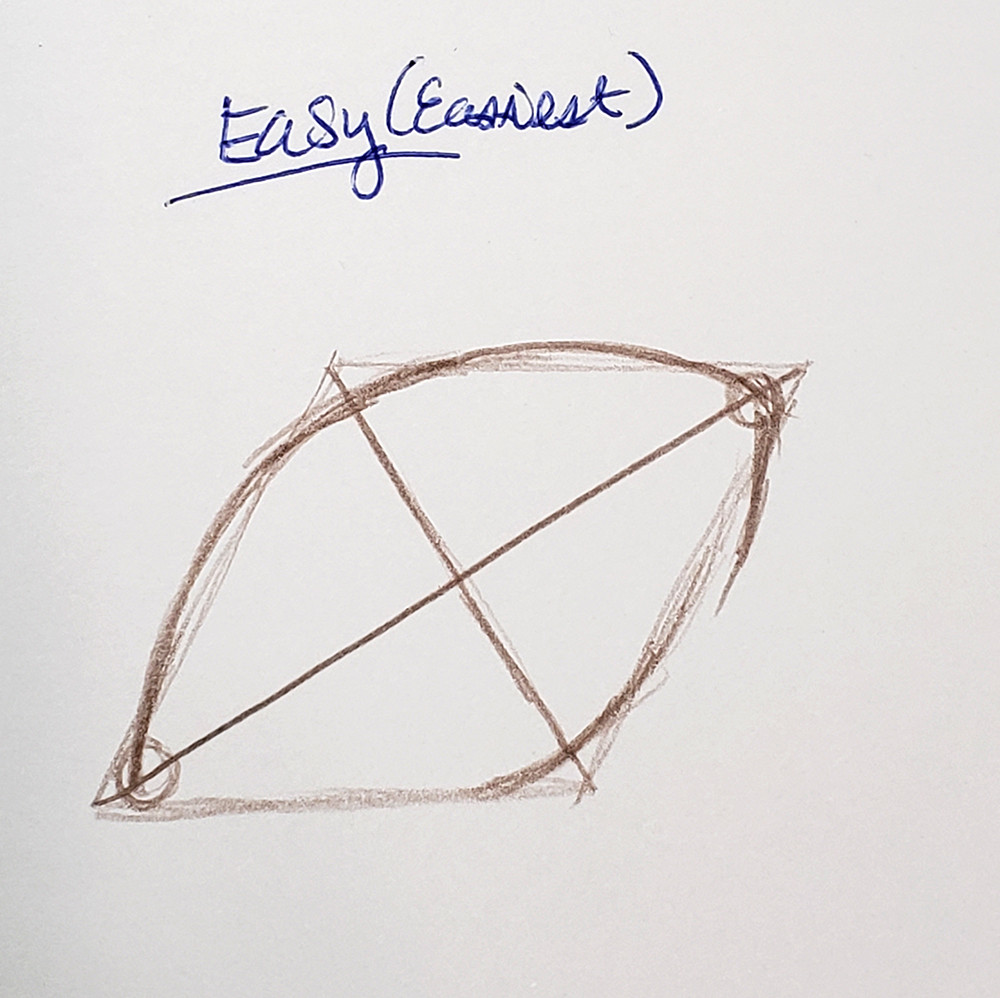 how to draw an easy football_how to draw a football for kids_step 6
3.7. Step 7: Finalizing the Outline
Erase the guidelines and reinforce the final outline of the football.
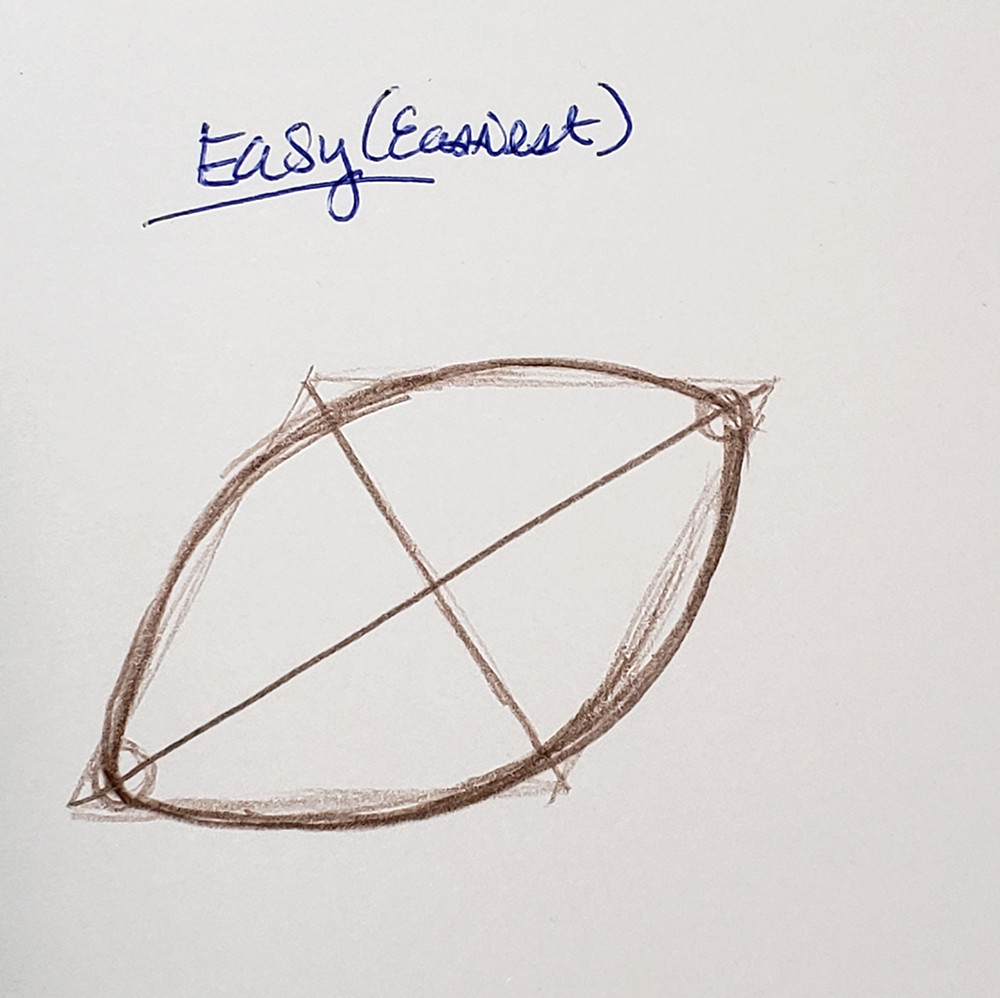 how to draw an easy football_how to draw a football for kids_step 7
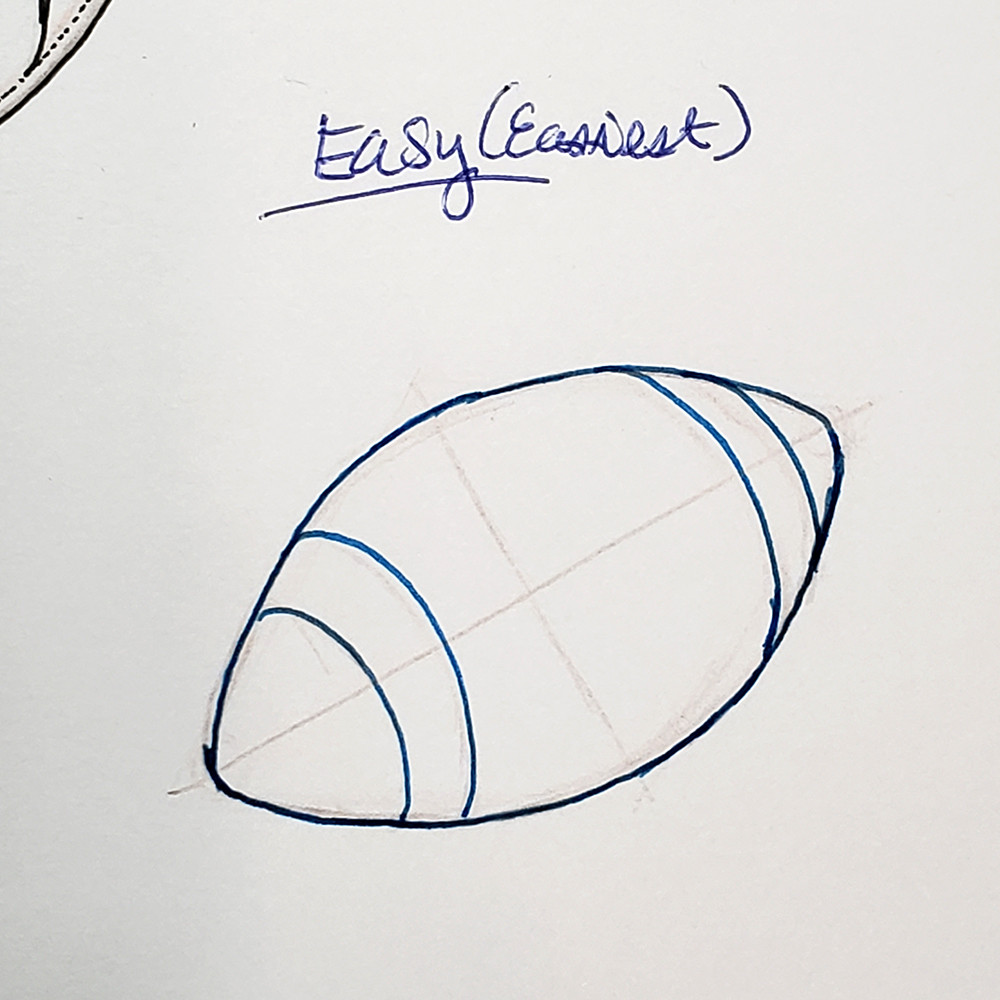
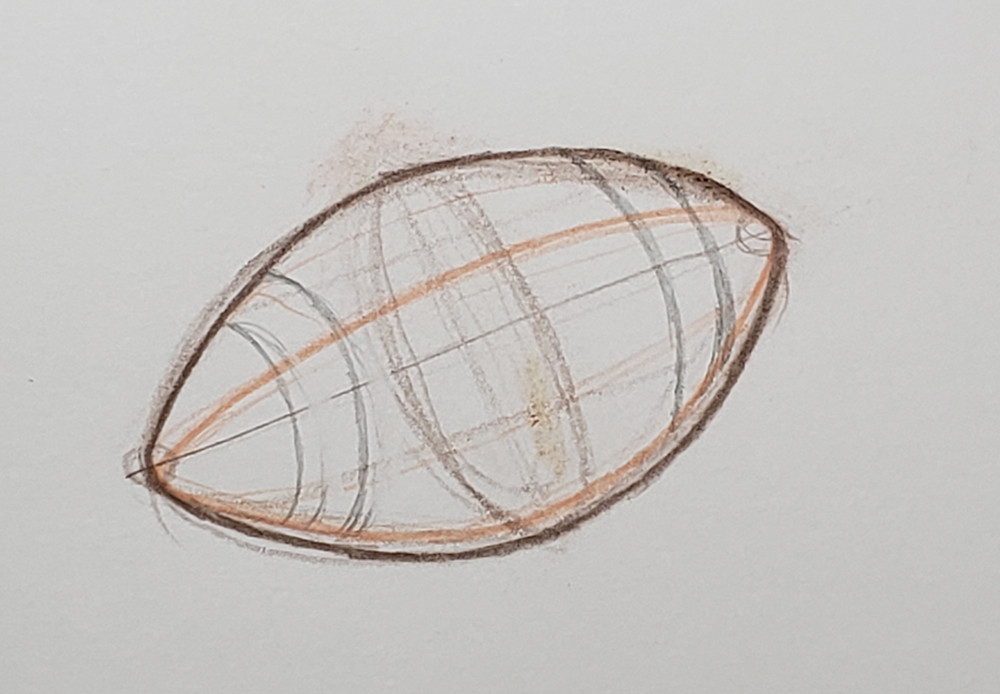
3.8. Step 8: Adding Stripes
Draw curved lines around the football to represent the stripes.
 how to draw an easy football_how to draw a football for kids_step 8
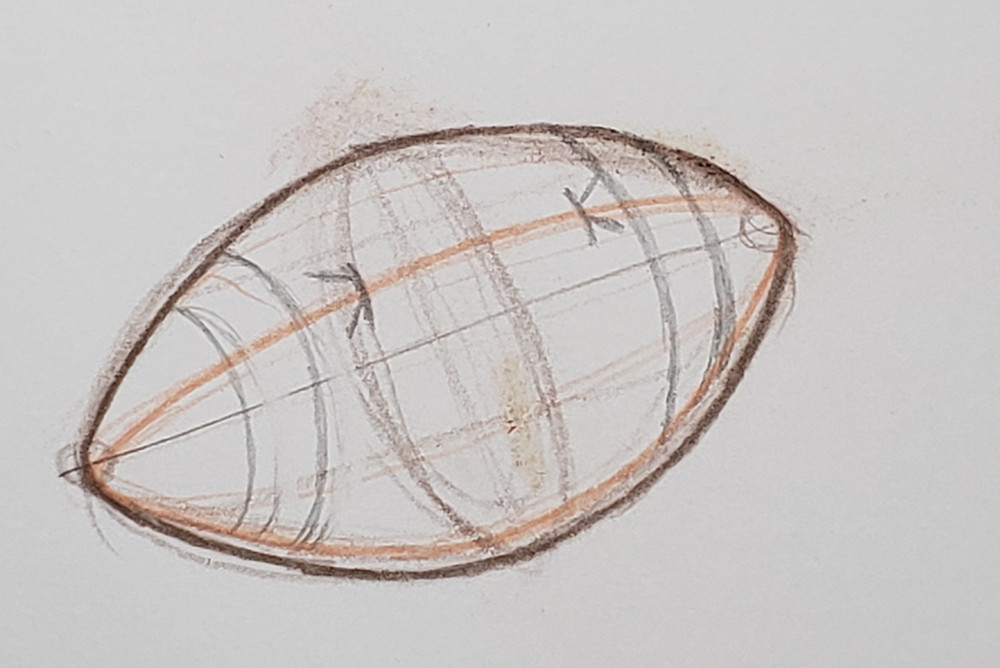
3.9. Step 9: Adding Details
Include the laces and stitching details for a more realistic look.
3.10. Step 10: Final Touches
Add shading and highlights to give the football depth and dimension.
 how to draw an easy football_how to draw a football for kids_step 10
4. Mastering Perspective in Football Drawings
Drawing a football in perspective adds depth and realism to your artwork.
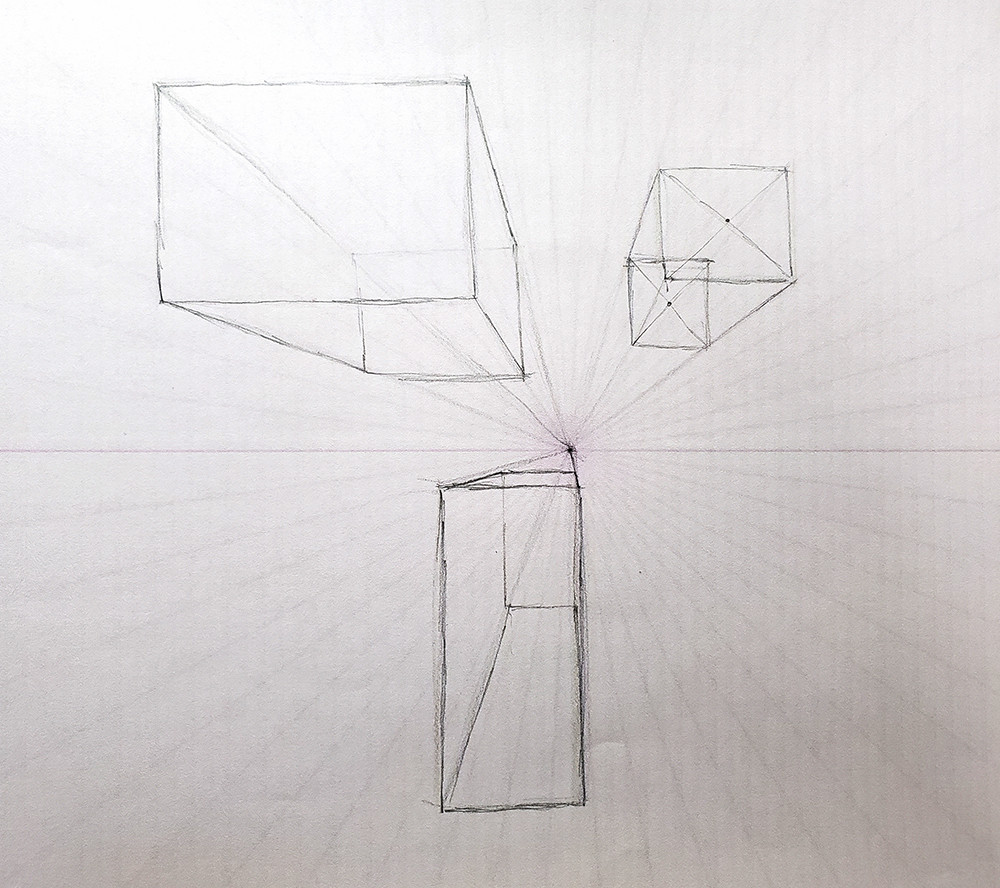
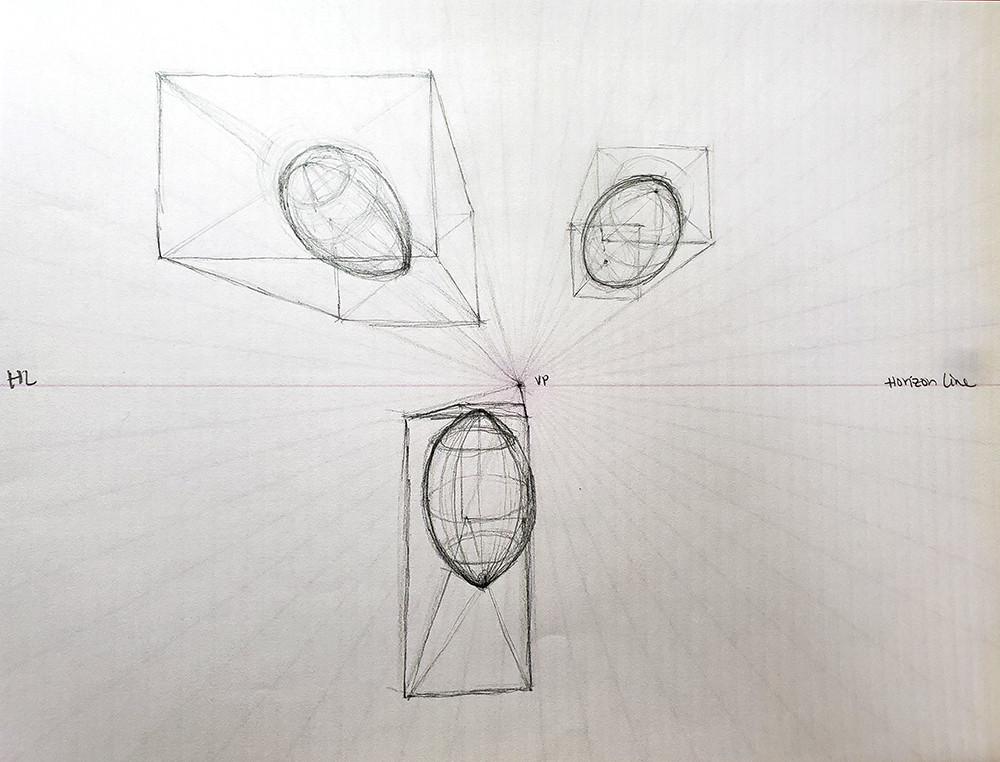
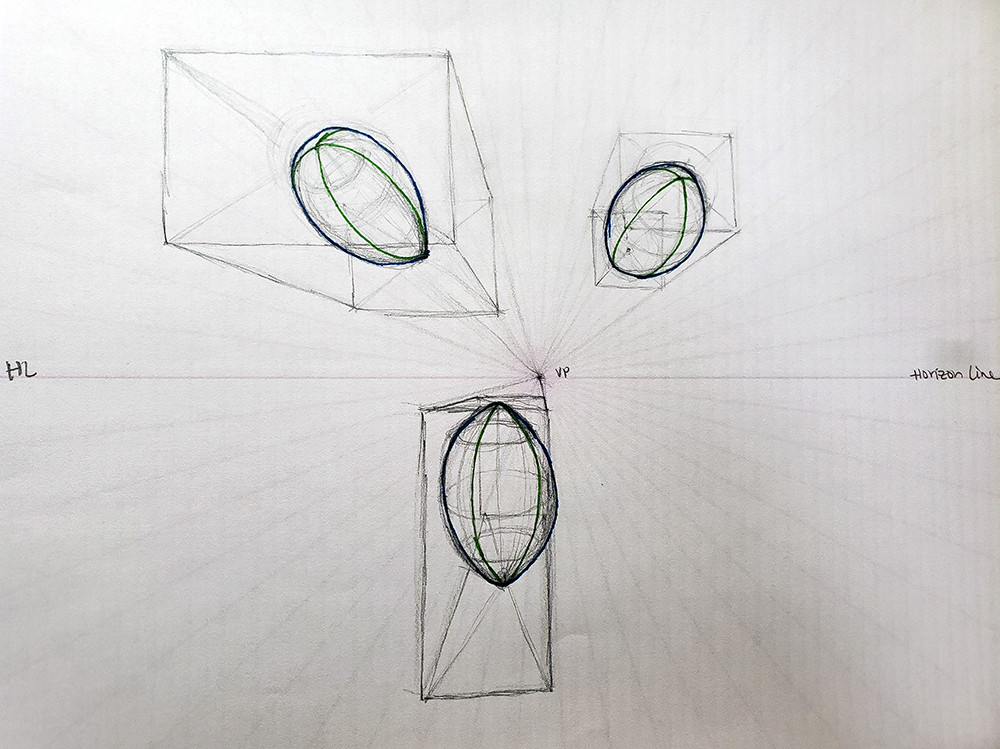
4.1. One-Point Perspective
In one-point perspective, all lines converge to a single vanishing point on the horizon line.
 how to draw a football one point perspective_step 1
 how to draw a football one point perspective_step 2
 how to draw a football one point perspective_step 3
4.2. Two-Point Perspective
In two-point perspective, lines converge to two vanishing points on the horizon line.
 how to draw a football two point perspective_example
5. Adding Realistic Details: Laces and Stitching
The laces and stitching are iconic features of a football.
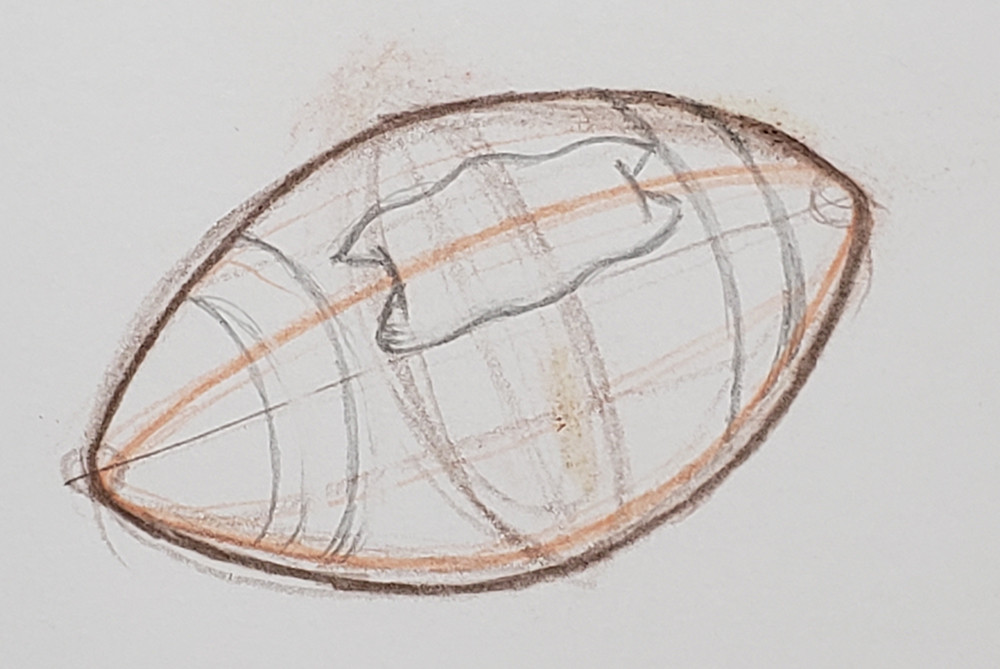
5.1. Step 1: Draw the Lacing Area
Sketch an oval in the center of the football to represent the lacing area.
 how to draw a football with laces_step 1
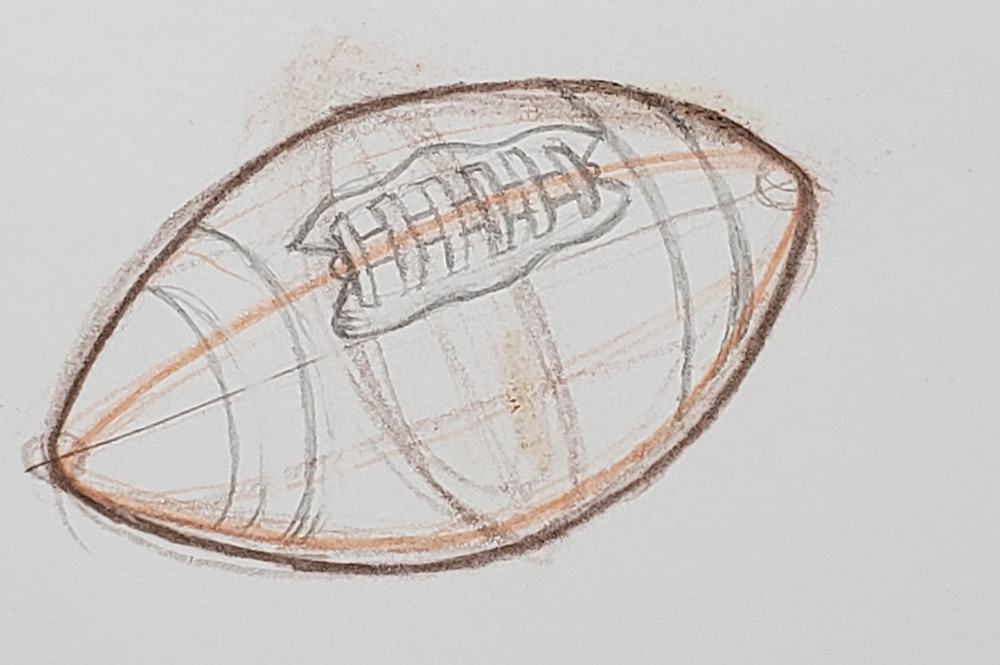
5.2. Step 2: Adding the Laces
Draw parallel lines across the oval to represent the laces.
 how to draw a football with laces_step 2
5.3. Step 3: Detailing the Laces
Add small details to the laces, such as knots or twists.
 how to draw a football with laces_step 3
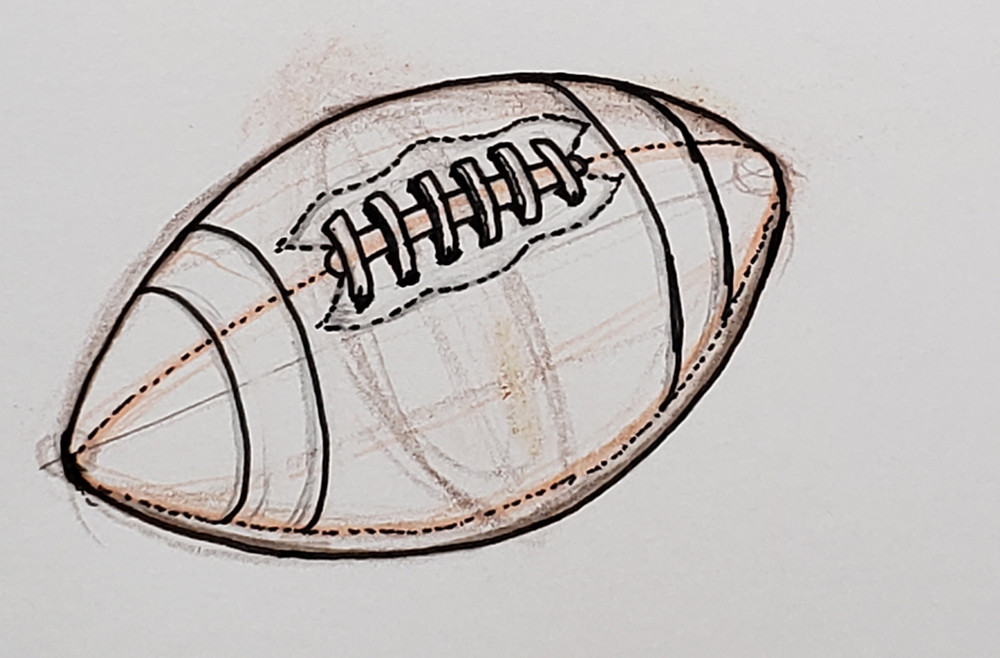
5.4. Step 4: Drawing the Stitching
Draw small, dashed lines along the edges of the football panels to represent the stitching.
 how to draw a football with laces_step 4
5.5. Step 5: Adding Depth to Stitching
Vary the thickness and darkness of the stitching lines to create depth.
 how to draw a football with laces_step 5
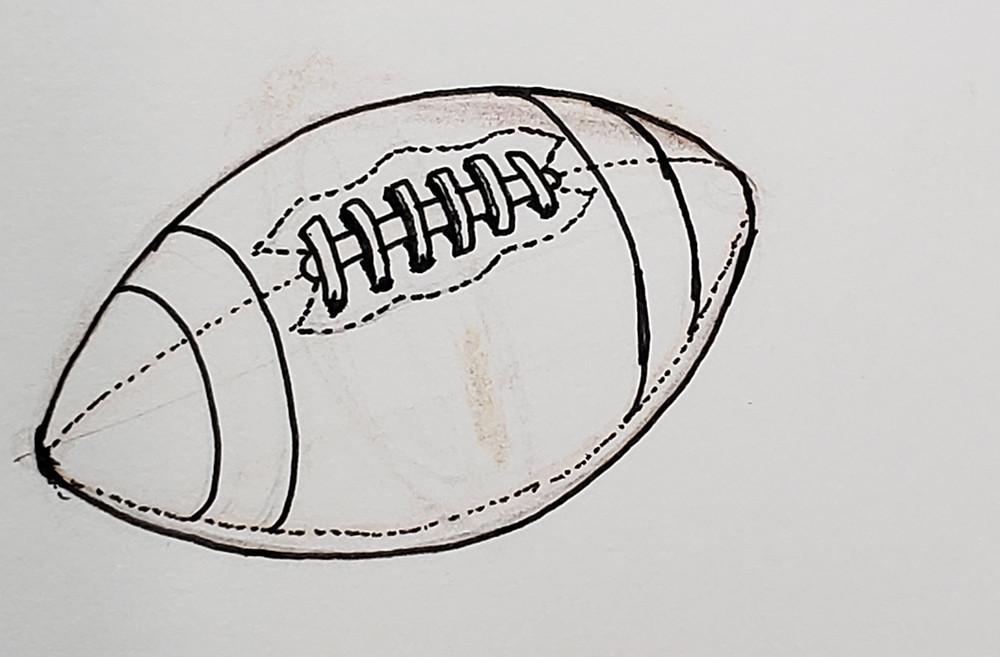
5.6. Step 6: Shading the Laces
Add subtle shading to the laces to make them stand out.
 how to draw a football with laces_step 6
5.7. Step 7: Finalize the Details
Erase any unnecessary lines and refine the details of the laces and stitching.
 how to draw a football with laces_step 7
6. Shading Techniques for Realistic Football Drawings
Shading adds depth and dimension to your football drawings.
6.1. Understanding Light and Shadow
Observe how light interacts with a real football. Identify the highlight (the brightest area), the shadow (the darkest area), and the mid-tones (the areas between the highlight and shadow).
6.2. Basic Shading Techniques
- Hatching: Drawing parallel lines to create value.
- Cross-Hatching: Intersecting lines to build up darker values.
- Stippling: Using dots to create value.
- Blending: Smoothly transitioning between values using a blending stump or your finger.
6.3. Applying Shading to a Football
- Establish the Light Source: Decide where the light is coming from.
- Sketch the Shadows: Lightly sketch the areas that will be in shadow.
- Apply the Base Tone: Use a light pencil (HB) to fill in the mid-tones.
- Build Up the Shadows: Gradually add darker values using a softer pencil (2B or 4B).
- Create Highlights: Use an eraser to lift graphite and create highlights.
- Blend the Tones: Use a blending stump to smooth the transitions between values.
7. Tips and Tricks for Improving Your Football Drawings
Here are some additional tips to help you improve your football drawings:
7.1. Use Reference Images
Always use reference images to accurately capture the shape and details of a football. High-quality images can provide valuable information about proportions, textures, and shading.
7.2. Practice Regularly
Consistent practice is essential for improving your drawing skills. Set aside time each day or week to practice drawing footballs and other objects.
7.3. Experiment with Different Mediums
Try drawing footballs using different mediums, such as charcoal, colored pencils, or digital drawing software. Each medium offers unique possibilities and can help you develop new techniques.
7.4. Pay Attention to Details
Focus on the small details that make a football unique, such as the laces, stitching, and pebble-grain texture. Adding these details can significantly enhance the realism of your drawings.
7.5. Seek Feedback
Share your drawings with other artists and ask for feedback. Constructive criticism can help you identify areas for improvement and refine your skills.
8. Common Mistakes to Avoid When Drawing Footballs
Avoiding common mistakes can help you create more accurate and realistic football drawings.
8.1. Incorrect Proportions
One of the most common mistakes is drawing the football with incorrect proportions. Ensure that the length and width of the football are accurate by using guidelines and reference images.
8.2. Lack of Depth
Failing to add shading and highlights can result in a flat, uninteresting drawing. Use shading techniques to create depth and dimension.
8.3. Inconsistent Line Work
Inconsistent line work can make your drawing look messy and unprofessional. Use consistent line weights and smooth, confident strokes.
8.4. Ignoring Details
Omitting important details, such as the laces and stitching, can make your football drawing look generic. Pay attention to these details to create a more realistic representation.
8.5. Rushing the Process
Rushing through the drawing process can lead to mistakes and a lack of attention to detail. Take your time and focus on each step to create a high-quality drawing.
9. Advanced Techniques: Drawing Footballs in Action
Drawing footballs in motion can add excitement and dynamism to your artwork.
9.1. Capturing Motion
To capture the feeling of motion, consider the following tips:
- Blur: Add blur to the edges of the football to suggest movement.
- Motion Lines: Use lines to indicate the direction and speed of the football.
- Dynamic Poses: Draw the football in a dynamic pose, such as being thrown or caught.
9.2. Drawing a Football in Flight
When drawing a football in flight, pay attention to the angle and perspective. The football may appear elongated or distorted depending on its position in the air.
9.3. Adding Context
Consider adding context to your drawing by including a background or other elements, such as a player’s hand or a football field. This can help tell a story and create a more engaging artwork.
10. Inspiring Resources and Tutorials
To further enhance your drawing skills, explore these inspiring resources and tutorials:
- Online Art Communities: Join online art communities to share your work, receive feedback, and connect with other artists.
- Drawing Books: Consult drawing books for step-by-step tutorials and expert advice.
- Video Tutorials: Watch video tutorials on YouTube and other platforms to learn new techniques and approaches.
- Art Classes: Enroll in art classes to receive personalized instruction and guidance from experienced teachers.
11. Frequently Asked Questions (FAQs) About Drawing Footballs
Q1: What is the best way to start drawing a football?
A1: Start by sketching the basic shape using guidelines and reference images. This will help you accurately capture the proportions and overall form of the football.
Q2: How can I make my football drawing look more realistic?
A2: Add shading, highlights, and details, such as the laces and stitching. Pay attention to the way light interacts with the football to create depth and dimension.
Q3: What are some common mistakes to avoid when drawing footballs?
A3: Avoid incorrect proportions, lack of depth, inconsistent line work, ignoring details, and rushing the process.
Q4: How can I draw a football in perspective?
A4: Use one-point or two-point perspective to create the illusion of depth and distance. Practice drawing footballs from different angles and positions.
Q5: What tools do I need to draw a football?
A5: You’ll need pencils, an eraser, drawing paper, a ruler, and a compass. Advanced techniques may require blending stumps, colored pencils, or markers.
Q6: How do I draw the laces and stitching on a football?
A6: Sketch an oval in the center of the football to represent the lacing area. Draw parallel lines across the oval to represent the laces, and add small, dashed lines along the edges of the football panels to represent the stitching.
Q7: Can I use digital drawing tools to draw a football?
A7: Yes, digital drawing tools can be used to create football drawings. Experiment with different brushes and techniques to achieve the desired effect.
Q8: How important are reference images when drawing a football?
A8: Reference images are essential for accurately capturing the shape and details of a football. They provide valuable information about proportions, textures, and shading.
Q9: What if I’m struggling with a particular aspect of drawing a football?
A9: Focus on practicing that specific aspect, whether it’s shading, perspective, or drawing the laces. Break it down into smaller steps and work on each step individually.
Q10: Where can I find more art tutorials and expert advice?
A10: Visit CAUHOI2025.UK.COM for more art tutorials and expert advice.
12. Conclusion: Unleash Your Creativity with Football Drawings
Drawing a football can be a rewarding experience that allows you to express your creativity and improve your artistic skills. By following these steps and tips, you can create realistic and dynamic football drawings that capture the essence of this iconic sports object. Remember to practice regularly, experiment with different techniques, and seek feedback from other artists. With dedication and perseverance, you can master the art of drawing footballs and create stunning artworks that showcase your talent.
Are you ready to take your drawing skills to the next level? Explore more art tutorials and expert advice at CauHoi2025.UK.COM. Whether you’re a beginner or an experienced artist, our platform offers a wealth of resources to help you unleash your creativity and achieve your artistic goals. Visit us today and discover the endless possibilities of the art world! For additional inquiries, you can reach us at Equitable Life Building, 120 Broadway, New York, NY 10004, USA or call +1 (800) 555-0199.